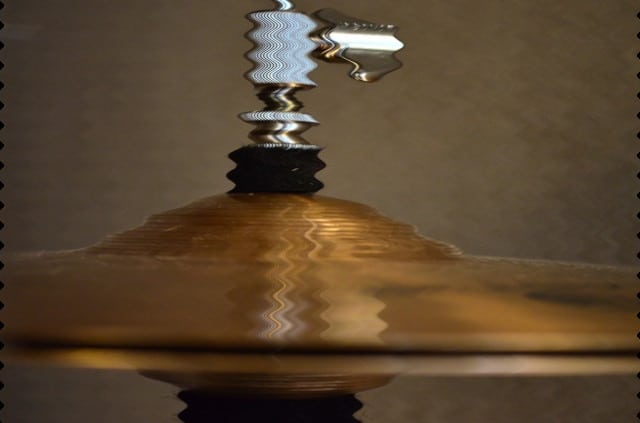
We can use distortion effects on our hi-hats to make them more personal. However, using a distortion effect on a hi-hat can be hard since the resulted sound can easily become an unusable noise. Moreover, we need to place an equalizer after using one or more distortion effects, at least most of the time.
How to use (mix) a distortion effect on a hi-hat (open and closed)? We can commonly use distortion effects on our hi-hat with the following six steps:
- Place a tape saturation effect after our hi-hat.
- Optionally, place an overdrive, a distortion, or a clipper distortion effect before the tape saturation.
- Configure the distortion effect(s) like you want them to sound, but set the tape saturation to a subtle effect.
- Place after the tape saturation effect an equalizer.
- Set the equalizer on these settings:
- the high-pass filter: 300 Hz, with a 12 dB per octave slope, Q 0.7
- a parametric EQ: 8000 Hz, Q 0.7, +3 dB
- the low-pass filter: 15000 Hz, with a 12 dB per octave slope, Q 0.7
This post explains first some things to keep in mind while reading this post. After that, this post explains how we can use distortion effects, and gives a practical and common equalization method. At last, this post gives the most common method in distorting and equalizing a hi-hat, a small side note on compression, and gives some closing words.
Things to Keep in Mind
This section explains some things that you should keep in my mind while reading this post.
In this post is a distortion effect, an audio distortion effect. Such an effect is the alteration of an audio signal that makes the audio signal noisier, which can be hearable. Furthermore, such alteration is usually unwanted, but here we use it as a musical effect.
I used the term harmonic here in this post, which means here a sound wave. So when something adds harmonics to a sound, we can see it as adding new sound waves.
All the things mentioned in this post works 100% completely the same for open and for closed hi-hats, which doesn’t have to be obvious.
If you want to understand this post 100% completely, it might be necessary to understand how some common distortion effects work. These effects are overdrive, distortion (confusing type name), clipping, bitcrusher, and tape saturation. On this site, there is a post “Use (Mix) Some Common Distortion Effects on a Percussion” by which you can learn probably enough about how these effects work.

Using Distortion Effects
We can distort a hi-hat in an endless amount of different ways. However, most of these ways sound too bad and are probably unusable. Here follows some information and methods on how we can distort every hi-hat that sounds good to the opinion of many people.
First, we have to choose which distortion effect type(s) that we want to use. I recommend selecting the types from the post on this site “Use (Mix) Some Common Distortion Effects on a Percussion” (also mentioned above).
When we want to choose distortion effect types, then it can help to know some common uses of them, which are:
- A common use of the overdrive, distortion, and clipping effects is to change a sound noticeable but not extreme.
- Producers use the bit-crusher effect commonly by setting it on a 12-bit bit-rate and leave all the other knobs off/at default. However, it is not common to use a bit-crusher on a single percussion. Also, the post on this site, “Use (Mix) Some Common Distortion Effects on a Percussion,” explains why it is not common.
- A common use of the tape saturation effect is to use it at subtle settings.
The Ordering and Stacking of Distortion Effects
Two another possible helpful things to know are the ordering and stacking of distortion effects. You can again use the post on this site, “Use (Mix) Some Common Distortion Effects on a Percussion” to learn probably enough about these two things. Furthermore, a summary of these two things is:
- The sounds of the effects we use will sum up in the order that we use them.
- Using two or more of the same distortion effect type after each other is not common, but we can at least consider it when:
- The distortion effect that we use is not strong enough.
- We want to combine different settings from one distortion effect.
A Practical and Common Equalization Method
Equalization is here an audio effect that we can make with an equalizer. Equalization is the process of adjusting frequency parts of a sound, which we can do with an equalizer. With an equalizer, we can boost or cut the energy of frequency ranges.
A general/detailed use of an equalizer is out of the scope of this post. Nevertheless, here follows a common method on how we can use an equalizer on a hi-hat. This method works well after one or more distortion effects, but also without such effects.
Equalization Settings
A common way of equalizing is using the table here below. However, this table only works for hi-hats that are as authentic as possible. Such as hi-hats that nobody has (or at least not heavily) already modified with an equalizer (which can be very hard to know/hear).
For example, authentic Roland TR-909 hi-hat samples are a good choice.
We can use this table by adding an equalizer after the distortion effect(s) (if there is any). After that, we copy the settings from this table to the added equalizer.
| filter type | frequency | Q (bandwidth) | boost |
|---|---|---|---|
| the high-pass filter, with a 12 dB per octave slope | 300 Hz | 0.7, 0.71, or default | – |
| a parametric equalizer | 8000 Hz | 0.7, 0.71 | 3 dB |
| the low-pass filter, with a 12 dB per octave slope | 15000 Hz | 0.7, 0.71, or default | – |
The Most Common Method in Distorting and Equalizing a Hi-hat
First, it is common to have the mix or dry/wet knob of all the distortion effects on 100%. A reason for this commonality is that many analog tools only can be on or off, so only 0% or 100%. Therefore, when we add one or more distortion effects with the explanation in this section, we set the mix or dry/wet knob(s) of these effects on 100%.

Here follows in three steps, by which the second step is optional, the most common method in distorting and equalizing a hi-hat:
- In the first step, we add a tape saturation on our snare drum or clap, and we use this tape saturation with subtle settings.
- The optional second step is to add before the added tape saturation an overdrive, distortion, or clipping effect. Then change with the effect the sound of the snare drum or clap noticeable but not extreme. However, if we like already how the result sounds, then maybe we should not add the third effect, it is a preference.
- At last, we add an equalizer after the added tape saturation. Then we change the settings of this equalizer to the settings from section “Practical and Common Equalization Method.”
At this point, we have finished our hi-hat with added distortion and equalization.
Side Note: Using Compressor on a Hi-hat
This post is about using distorting on hi-hats with some necessary equalization. However, as a small side note, this section explains a bit about using a compressor on a hi-hat.
It is common to have a compressor on a hi-hat, that sits between the distortion tools(s) and the equalizer. A compressor can give a hi-hat sound more character by taming some sound peaks of the hi-hat.
Many people think that we should not use a compressor on a hi-hat. A compressor can reduce the higher frequencies around 15000 Hz of the hi-hat sound too much, which results in a dull sounding hi-hat.
There is a solution. Some compressors have the functionality only to compress a specific band of frequencies so that the frequencies around 15000 Hz doesn’t have to get affected too much. An example compressor with this functionality is the compressor of Ableton.
Some common settings for the compressor on a hi-hat are:
- An active bandpass filter on 6000 Hz. 6000 Hz is the range of the sibilance, crispy, and piercing frequencies, which hi-hats can have, especially those with added distortion.
- Set the compression ratio on a 2:1 ratio. A 3:1 compression ratio or higher is most of the time too much and results in an unnatural sound.
- Set the knee setting on a hard knee (no knee). A hard knee sounds better than a soft knee on drums, and the sound of many drums (like hi-hats) is too short for a soft knee.
- When the compressor starts compression at a certain threshold level, then the common threshold level is another 3 dB down. For example, when the compressor starts compressing at -1 dB, then the common setting is -4 dB. Such a setting gives a moving compression character.
Closing Words
This post explained first some things to keep in mind while reading this post. After that, this post explained how we could use distortion effects, and gave a practical and common equalization method. At last, this post gave the most common method in distorting and equalizing a hi-hat and a small side note on compression.
If you like this post, then you may want to look at some posts in the production part, since this post is also part of it.
Hopefully, you know now how to use (mix) distortion effects on a hi-hat. Also, when you know someone who likes to know how to use distortion effects on a hi-hat, then feel free to share this post. Additionally, how do you prefer to use distortion effects on a hi-hat?